|
|
|
|
|
|
|
 |
|
 |
|
|
|
|
Our site is 256 bit SSL SECURED. SSL (Secure Socket Layer) is the industry standard for viewing and sending sensitive information
on an internet browser. Click on the SSL image below see our site report.
|

|
|
|
 |
|
 |
|
|

|
 |
|
 |
|
|
|
|
All DOT 3AA and DOT 3AL Scuba Cylinders, SCBA Composite Cylinders (Fire Depts. and Military) Paint Ball Cylinders both 3AL and
Composite, CO2 Cylinders, and many others cylinders. Most tank inspections can be completed within 1 day.
As of
January 1, 2017, DIVING FOR FUN will
NOT be performing visual tank inspections and services. However, we wanted to continue to provide
our step-by-step visual inspection procedures as a reference for all our past customers.
Other tank services include:


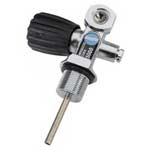
- Tank Valve Service (J & K Valves)
- Oxygen Cleaning
- Tank Tumbling
To maintain a high level of safety all visual inspections should be performed by trained professionals using safety check standards, and
tools provided by Advanced Inspection Technology and
Professional Scuba Inspectors, Inc.
 As
most scuba divers are aware, scuba tanks must be hydrostatically tested every five years. This test
assures that the tank has not lost its elasticity and become brittle through use, abuse or heat damage.
However, simply passing a hydro test does not assure that a tank is safe. Visual inspections are required to be
performed annually to ensure no other defects or dangers exist. Most tank failures and injuries are due to
factors normally found during the visual inspection process. Some of these defects may include: As
most scuba divers are aware, scuba tanks must be hydrostatically tested every five years. This test
assures that the tank has not lost its elasticity and become brittle through use, abuse or heat damage.
However, simply passing a hydro test does not assure that a tank is safe. Visual inspections are required to be
performed annually to ensure no other defects or dangers exist. Most tank failures and injuries are due to
factors normally found during the visual inspection process. Some of these defects may include:
- Cracks in tank walls or threads
- Corrosion and pitting
- Wrong valve
- Heat damage
- Wrong burst disk
- And much more...
| VISUAL INSPECTION PROCESS |
A cylinder should be thoroughly inspected in several areas before an Evidence of Inspection (EOI) sticker is affixed to the cylinder. The EOI sticker is
your assurance that a professional inspection has been performed. The inspection process should comply with C.G.A, P.S.I. and O.S.H.A. standards.
Below are the strict step-by-step inspection process which should be followed on EVERY tank Visual Inspection performed.
|

|
|

|
|
|
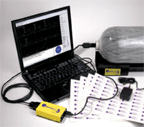
VisualPlus 3 Equipment |
|
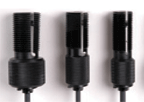
Tank Thread Probes |
|
- SLOWLY Drain Cylinder
- Observe & Record Background Data
- Remove ALL Accessories
- Administer Hammer Test to Steel Cylinders
 Remove Tank Valve Remove Tank Valve- Check For and Remove Any Foreign Objects
- View Interior of Cylinder
- Inspect Interior with Pick/End Probes
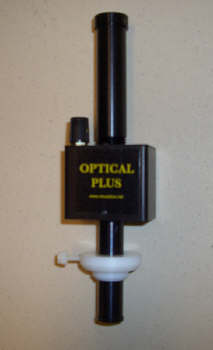
- Inspect Cylinder Threads - Visual Plus (Eddy Current) for Aluminum Tanks and
Optical Plus for all other tanks
- Replace the Tank Valve O-Ring
- Inspect the Over-Pressure Frangible Disc Exhaust Ports
- EVALUATE ALL DATA
- MAKE JUDGMENT
- Lubricate Valve Threads, Reinstall Tank Valve, and Torque to Manufacturer Specification
- Apply Evidence of Inspection (EOI) Sticker
- Fill Cylinder and Check for Leaks
- Complete all Forms and Paperwork for each Cylinder
- Return Cylinder
Upon the completion of the visual inspection process, an Evidence of Inspection (EOI) Sticker should be affixed to the cylinder, record all inspection
information, and print a inspection report for your records. To see an example of a visual
inspection report click here
or click on one of the report images below.
| TANKS THAT SHOULD NOT BE INSPECTED |
Because of safety concerns, we recommend to NOT inspect the following tanks:
- AL tanks manufactured between 1983 and 1989
- AL tanks with round bottoms
- Steel tanks with any significant signs of rust
- Tanks with vinyl or unknown interior coatings
- Any tank with signs of pitting
- Any tank with illegible DOT markings
- Tanks marked condemned
- Any tanks manufactured by Walter Kidde
Prior to any cylinder or valve service is performed an Inspection Release Form
should be completed.
|
 |
If you need additional information or have questions,
we can be reached at our Contact Us page or visit our
Sign Up page.
|
 |
|
|
|
|
|
 |
|
 |
|

|